About four years ago, a friend gave me a grapevine. It didn’t even sprout a grape for years, but it kept sprawling down the fence along our driveway. Last year, we finally had grapes and I was so excited! They were beautiful! I kept waiting for them to ripen just enough to pick. One day, I went outside and noticed that every last grape was gone. Someone had a feast.
This year, I beat out whatever furry or feathery animal got them all last year. I went out with the biggest metal bowl I could find and started harvesting the grapes during Anderson’s nap time. The bowl quickly filled. I grabbed my largest colander and filled that. Then, I yelled to Chris to grab me another bowl and filled that too. I couldn’t believe how many grapes came from one plant.
Hello, jelly.
It took hours to sort through all of the grapes, ditching the completely green ones and the ones that were already dried up and shriveled as well as pulling every single grape from the stems.
Once sorted, I was ready to make the jelly. I hated that the ball recipe called for 7 cups of sugar per 4 cups of grape “juice.” That just seemed gross to me, so I purchased low-sugar pectin and here’s how we made our first batch of jelly made from grapes literally from our backyard, which I believe are concord grapes.

Grape Jelly
4 cups of grape juice (see how to make this juice below)
2 1/2 cups of sugar
3 teaspoons of low-sugar pectin
water
Note: Jelly making takes time! When all was said and done, I’d say this took about four hours, maybe more.
Spooky is our low-sugar pectin model.

First, make the juice.
Once your grapes are sorted, add them into a pot with just a little bit of water, about a quarter of a cup per four cups of grapes. Mash the grapes with a potato masher. If you have a large amount of grapes, add the them gradually to ensure they fit in your pot.
 I wouldn’t have been able to fit all of those whole grapes even in my largest pot, but I was able to fit them all in by adding them in batches. Cook them until they are completely mushed and the skins lose color.
Next, strain.
I won’t lie to you. This step is tedious and annoying.
First, I strained the cooked grapes through a large colander to remove the skin and majority of the seeds.

This is what grape pulp looks like. Pretty freaky huh? Great for your composter if you have one.

I then strained it a second time through a jelly bag made of nylon.

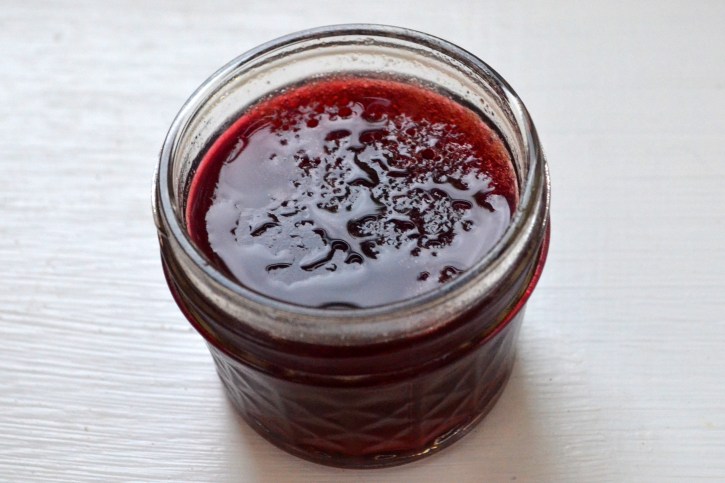
I ended up with this beautifully colored, thick grape juice.

Use the juice to make the jelly.
Take four cups of your juice and add 2 1/2 cups of sugar. Stir until it dissolves. Important note: even if you have more juice than four cups, make the jelly in smaller batches to make sure it sets.
Bring the juice to a boil and continue to stir for several minutes. In my efforts to take a picture, I allowed my to boil over a little. Oops!

After the liquid starts to thicken, turn the heat down, add three teaspoons of pectin, and bring back up to a boil for a minute or two.
The best test I found to determine if your jelly is ready and will set is to drizzle a little on a plate and stick it in the freezer for about 30 seconds to get it down to room temperature. If you slide your finger through it and it and the jelly slowly fills the space, it is ready. If it is liquid-y and fills the space quickly, boil your jelly for a bit longer and try the test again.

Get your jars ready.
Now it is time to pour your jelly into jars.

We found this handy funnel tool that worked great to prevent the edges of the jars from getting jelly on them (which would prevent a proper seal later).

Don’t worry if you don’t have one. You will just have to grab a wet paper towel and wipe the edges before you put lids on. Leave 1/4 inch of head space in the jar.

Put your lids on (that have been cleaned in warm, soapy water). Now it is time for the water bath process. Place the jars with the lids on into boiling water. Boil for ten minutes.

Take them out and set them on a towel on your counter.

Within a few minutes, you’ll start to hear all of the “pops” of the lids sealing. Once cooled, your jelly is ready and hopefully it set!

I went through this process three times and ended up with soooo much jelly. I’ve given jars away and thankfully Anderson loves PB&J. I love it on toast. My mother just told me today that she’s going to use hers to make thumbprint cookies. It is a lengthy process, but well worth it I’d say. Canning and preserving is good for the soul.
Eat.

Oh and just in case you are wondering, I did leave some grapes on the vine for the animals. The very next day, Chris saw racoons eating them.


I can’t wait to get my jar!
Yum!
Pingback: out with the old and in with the new | 1 veggie at a time